

th6220d1028 installation manual
Honeywell TH6220D1028 Installation Manual: A Comprehensive Guide
This guide offers comprehensive instructions for installing the Honeywell TH6220D1028 FocusPRO 6000 series thermostat; It covers everything from initial setup and wiring to advanced configuration options․ Follow this guide to optimize your home’s energy efficiency and climate control․
Product Overview: Honeywell FocusPRO TH6220D
The Honeywell FocusPRO TH6220D thermostat is a programmable device designed for efficient home climate control․ It supports both single-stage and multi-stage heating and cooling systems‚ accommodating up to 2 heat and 2 cool configurations․ This thermostat allows for flexible programming‚ enabling users to set different temperatures for various time periods throughout the day‚ optimizing energy usage and reducing costs․
The TH6220D offers features such as adaptive intelligent recovery‚ which learns your heating/cooling patterns to ensure the desired temperature is reached precisely when scheduled․ Its user-friendly interface and clear display make it easy to program and monitor settings․ The thermostat also includes built-in compressor protection to prevent damage and extend the lifespan of your HVAC system․
With its ability to manage both conventional and heat pump systems‚ the Honeywell FocusPRO TH6220D provides a versatile and reliable solution for maintaining a comfortable and energy-efficient home environment․ It’s designed for ease of installation and operation‚ making it a popular choice for homeowners․
Package Contents and Required Tools
Before commencing the installation of your Honeywell FocusPRO TH6220D thermostat‚ it is crucial to verify that all necessary components are present in the package․ Typically‚ the package includes the FocusPRO TH6220D programmable thermostat itself‚ with the wallplate attached to the back․ You should also find an operating manual‚ providing detailed instructions and guidance for setup and usage․
Additionally‚ the package contains wall anchors and mounting screws‚ usually two of each‚ to secure the thermostat to the wall․ Two AA alkaline batteries are included to power the device․ Ensure that these items are present before proceeding․
To complete the installation‚ you will need several tools․ A screwdriver (both Phillips and flathead) is essential for wiring and mounting the thermostat․ A wire stripper will be necessary to prepare the thermostat wires for connection․ A level ensures the thermostat is mounted straight on the wall․ A drill might be needed for creating pilot holes for the wall anchors‚ especially on harder surfaces․ Finally‚ a flashlight can be helpful for illuminating the wiring area․
Pre-Installation Checklist
Prior to installing your Honeywell FocusPRO TH6220D thermostat‚ completing a thorough pre-installation checklist is vital to ensure a smooth and successful setup․ First‚ turn off power to your heating and cooling system at the breaker or switch to avoid electrical shock․ Next‚ carefully remove your old thermostat from the wall․ Disconnect the wires‚ labeling each one with tape or markers corresponding to its terminal connection․ This will be invaluable during the wiring process for the new thermostat․
Examine the existing wiring to ensure it is in good condition․ Replace any frayed or damaged wires before proceeding․ Check the compatibility of your system․ The TH6220D supports a range of systems‚ including single-stage and multi-stage heating and cooling systems‚ as well as 750 mV heating systems․ Confirm that your system type is compatible․
Choose a suitable location for the new thermostat․ It should be about 5 feet above the floor in an area with good air circulation and away from direct sunlight or drafts․ Gather all the necessary tools‚ including a screwdriver‚ wire stripper‚ level‚ and drill‚ ensuring they are readily accessible․ Lastly‚ review the package contents to confirm that all components are present․
Wallplate Installation
The correct installation of the wallplate is a critical step in setting up your Honeywell FocusPRO TH6220D thermostat․ Begin by separating the wallplate from the thermostat body․ Gently detach it to avoid damage․ Position the wallplate on the wall at the desired location‚ ensuring it is level for accurate temperature readings․ Use a level tool to confirm․
Mark the locations for the mounting screws through the holes on the wallplate․ If you are mounting on drywall‚ use the provided wall anchors to ensure a secure hold․ Drill pilot holes at the marked locations‚ if necessary․ Insert the wall anchors into the pilot holes‚ then align the wallplate with the anchors․
Secure the wallplate to the wall using the mounting screws․ Tighten the screws until the wallplate is firmly attached‚ but avoid over-tightening‚ as this can damage the wallplate or the wall․ Ensure that the wallplate sits flush against the wall․ Once the wallplate is securely mounted‚ proceed to the next step of wiring the thermostat according to your system configuration․ This process sets the foundation for proper thermostat operation․
Wiring Guide for Conventional Systems

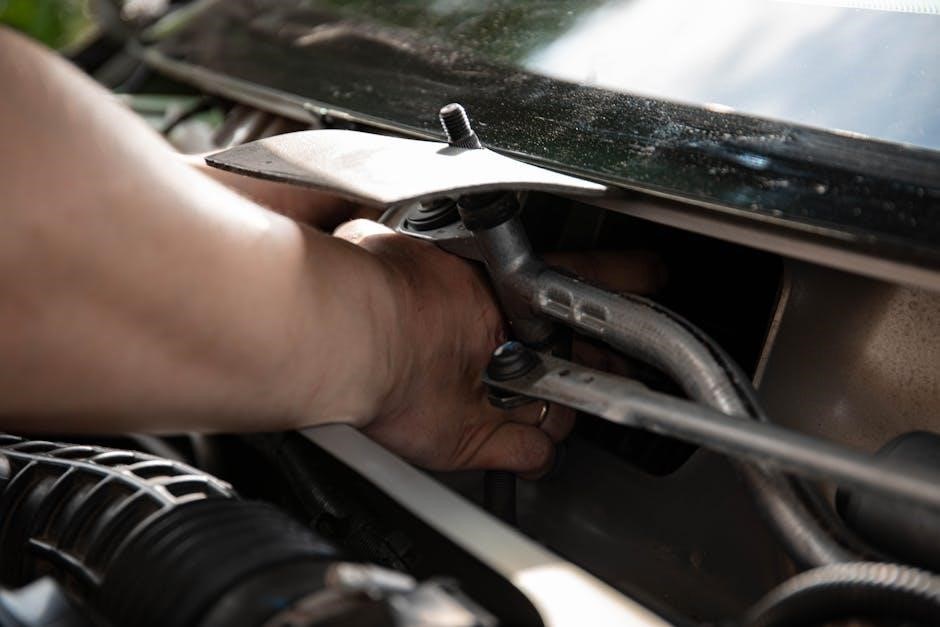
This section details the wiring process for conventional heating and cooling systems using the Honeywell TH6220D1028 thermostat․ Before starting‚ ensure that the power to your HVAC system is turned off at the breaker to prevent electrical shock․ Refer to your existing thermostat’s wiring configuration for guidance․ Typically‚ conventional systems use terminals such as R‚ W‚ Y‚ G‚ and C․
Connect the wires from your heating and cooling system to the corresponding terminals on the thermostat’s wallplate․ The R terminal is usually for the 24VAC power supply․ The W terminal connects to the heating system‚ Y to the cooling system‚ and G to the fan․ If your system has a common wire‚ connect it to the C terminal for enhanced performance․
Ensure each wire is securely attached to its respective terminal‚ avoiding loose connections․ Double-check the wiring diagram provided with your thermostat and your HVAC system’s documentation to confirm accurate connections․ Incorrect wiring can damage your system or the thermostat․ After verifying the connections‚ carefully tuck the wires back into the wall opening and proceed with mounting the thermostat to the wallplate․
Wiring Guide for Heat Pump Systems
This section explains the wiring for heat pump systems with the Honeywell TH6220D1028 thermostat․ Prior to commencing‚ switch off power to the HVAC system at the breaker․ Heat pump systems generally use terminals R‚ Y‚ G‚ O/B‚ and C․ The O/B terminal controls the reversing valve‚ which switches between heating and cooling modes․
Connect the wires from your heat pump to the corresponding terminals on the thermostat’s wallplate․ The R terminal connects to the 24VAC power supply․ The Y terminal connects to the compressor․ The G terminal connects to the fan․ The O/B terminal requires careful attention: if your system reverses for cooling‚ connect the wire to the O terminal; if it reverses for heating‚ connect it to the B terminal․
A common wire connected to the C terminal is recommended for stable operation․ Securely fasten each wire to the respective terminal‚ ensuring no loose connections․ Refer to your system’s wiring diagram and the thermostat’s documentation for accuracy․ Incorrect wiring can harm your equipment․ After ensuring all connections are correct‚ carefully tuck the wires back into the wall opening and proceed with mounting the thermostat․
Power Options and Mounting
The Honeywell TH6220D1028 thermostat offers flexible power options to suit different installation requirements․ It can operate either on battery power or via a 24VAC common wire connection․ For battery-powered operation‚ insert two fresh AA alkaline batteries into the compartment located at the back of the thermostat‚ ensuring correct polarity․ Battery power is a convenient option where a common wire is unavailable․
However‚ a 24VAC common wire (C-wire) connection is recommended for enhanced performance and to prevent battery drain․ Connecting a C-wire provides a stable power source‚ especially in systems with backlighting or frequent usage․
Once the power source is established‚ proceed with mounting the thermostat․ Position the wallplate on the wall at the desired location‚ typically about five feet above the floor in an area with good air circulation․ Use a level to ensure the wallplate is straight․ Mark the mounting holes with a pencil‚ then drill pilot holes if necessary․ Secure the wallplate to the wall using the provided screws and wall anchors․
Finally‚ align the thermostat with the wallplate and gently press it into place until it snaps securely․ Ensure it is firmly attached and flush against the wall․
Installer Setup: Configuring the Thermostat
After mounting and wiring the Honeywell TH6220D1028‚ the next crucial step is to configure the thermostat to match your specific heating and cooling system; This is done through the Installer Setup menu‚ which allows you to customize various settings and features․ To access this menu‚ simultaneously press and hold the “System” and “Fan” buttons until the display changes․
The Installer Setup menu presents a series of function numbers‚ each corresponding to a specific setting․ Use the up and down arrow buttons to navigate through the function numbers․ Once you reach the desired function‚ press the “Hold” button to view the current setting․ Use the arrow buttons again to change the setting to your desired value․
Important configurations include setting the system type (e․g․‚ heat pump‚ conventional)‚ configuring the number of heating and cooling stages‚ and adjusting cycle rates․ It’s essential to consult your HVAC system’s documentation to determine the correct settings for optimal performance․ Incorrect settings can lead to inefficient operation or even damage to your equipment․
After configuring each function‚ press the “Hold” button to save the changes․ Once you have completed all necessary configurations‚ press the “System” button to exit the Installer Setup menu․ Your thermostat is now configured and ready for use․
System Type Configuration
Configuring the system type is a crucial step in setting up your Honeywell TH6220D1028 thermostat‚ ensuring it operates correctly with your heating and cooling system․ Access the Installer Setup menu by pressing and holding the “System” and “Fan” buttons simultaneously until the display changes․ Navigate to the system type configuration function using the up and down arrow buttons․
The specific function number for system type varies‚ so consult your thermostat’s manual․ Once you’ve located the function‚ press “Hold” to view the current setting․ The available options typically include settings for conventional systems (furnace and air conditioner)‚ heat pump systems‚ and systems with varying stages of heating and cooling․
Carefully select the option that accurately reflects your system․ For example‚ if you have a standard furnace and air conditioner‚ choose the conventional system setting․ If you have a heat pump‚ select the appropriate heat pump setting‚ specifying whether it’s a single-stage or multi-stage system․ Incorrect configuration can lead to improper operation‚ such as the thermostat calling for heat when it should be cooling‚ or vice versa․
After selecting the correct system type‚ press “Hold” to save the setting․ Then‚ exit the Installer Setup menu by pressing the “System” button․ Your thermostat is now configured for your specific system․
Auto Changeover Function (Setup Function 12)
The Auto Changeover function (Setup Function 12) on the Honeywell TH6220D1028 thermostat is particularly useful in climates where both heating and cooling are required on the same day․ This feature allows the thermostat to automatically switch between heating and cooling modes to maintain a consistent indoor temperature․
To configure Auto Changeover‚ enter the Installer Setup menu by pressing and holding the “System” and “Fan” buttons until the display changes․ Navigate to Setup Function 12 using the up and down arrow buttons․ The display will show the current setting‚ which is typically either “On” or “Off”․
When Auto Changeover is set to “On‚” the thermostat will automatically switch between heating and cooling based on your set points․ For example‚ if you set the heating set point to 70°F and the cooling set point to 75°F‚ the thermostat will engage the heating system if the room temperature falls below 70°F and the cooling system if the temperature rises above 75°F․
If Auto Changeover is set to “Off‚” the thermostat will remain in whichever mode you manually select (Heat‚ Cool‚ or Off)․ This is suitable for climates where only one mode is typically needed․ To change the setting‚ press the up or down arrow button until the desired option is displayed‚ then press “Hold” to save the change․ Exit the Installer Setup menu by pressing the “System” button․
Adaptive Intelligent Recovery (Setup Function 13)
Adaptive Intelligent Recovery (AIR)‚ configured through Setup Function 13 on the Honeywell TH6220D1028‚ is a smart feature designed to optimize your home’s temperature settings according to your schedule․ Instead of simply turning on the heating or cooling system at the set time‚ AIR learns how long it takes to reach your desired temperature and starts the system earlier to ensure the target temperature is achieved precisely when you want it․
To adjust the Adaptive Intelligent Recovery setting‚ access the Installer Setup menu by pressing and holding the “System” and “Fan” buttons until the display changes․ Navigate to Setup Function 13 using the up and down arrow buttons․ The display will show the current setting‚ which is usually either “On” or “Off․”
When AIR is enabled (“On”)‚ the thermostat will monitor temperature changes and calculate the optimal start time for your heating or cooling system․ This ensures that your home reaches the desired temperature at the scheduled time‚ even on days with extreme weather conditions․
If AIR is disabled (“Off”)‚ the thermostat will simply turn on the heating or cooling system at the set time‚ without any pre-emptive adjustments․ This can result in a delay in reaching the desired temperature‚ especially on colder or hotter days․ To change the setting‚ press the up or down arrow button until the desired option is displayed‚ then press “Hold” to save the change․ Exit the Installer Setup menu by pressing the “System” button․
Troubleshooting: Common Issues and Solutions
Encountering issues with your Honeywell TH6220D1028 thermostat? Here’s a guide to common problems and their solutions․ If the thermostat display is blank‚ first check the batteries․ Ensure they are fresh AA alkaline batteries and are installed correctly‚ paying attention to polarity․ If battery replacement doesn’t solve the issue‚ verify the wiring connections are secure and properly connected to the correct terminals․
If the thermostat isn’t maintaining the set temperature‚ ensure the system type is correctly configured in the Installer Setup menu․ Incorrect settings can lead to the thermostat not controlling the heating or cooling system effectively․ Also‚ check that the desired temperature is within the operating range of the system․
For issues with the fan not operating correctly‚ confirm the fan setting is set to “Auto” or “On” as desired․ Verify the wiring connection for the fan is secure․ If the system cycles too frequently‚ adjust the cycle rate setting in the Installer Setup menu to match the system type․
If the thermostat displays an error code‚ consult the full user manual for the specific meaning of the code and recommended actions․ For persistent problems‚ resetting the thermostat to factory defaults through the Installer Setup menu can sometimes resolve configuration issues․ If all else fails‚ contacting a qualified HVAC technician for assistance is recommended․
Battery Replacement
Maintaining adequate battery power is essential for the reliable operation of your Honeywell TH6220D1028 thermostat․ When the thermostat displays a low battery warning‚ it’s time to replace the batteries promptly to avoid any disruption in heating or cooling control․ The TH6220D1028 uses two AA alkaline batteries․
To replace the batteries‚ locate the battery compartment on the thermostat․ The TH6220D1028 features an easy-change battery door‚ which flips out for convenient access․ Open the battery door by gently pressing and releasing the latch․ Remove the old batteries‚ noting their orientation (+ and -)․
Insert the new AA alkaline batteries‚ ensuring they are correctly aligned according to the polarity markings inside the compartment․ Close the battery door until it clicks securely into place․ After replacing the batteries‚ the thermostat will automatically resume its normal operation․
It’s recommended to replace the batteries annually‚ even if the low battery warning hasn’t appeared‚ to prevent potential issues caused by depleted batteries․ When replacing batteries‚ always use fresh AA alkaline batteries for optimal performance and longevity․ Avoid using rechargeable batteries‚ as they may not provide the consistent voltage required for proper thermostat operation․ Proper battery maintenance ensures uninterrupted comfort and energy savings from your Honeywell thermostat․